Application Setup Guide
Monetizing Your App with X3M Loomit
To begin monetizing your app, you must first create your application in X3M Loomit. Follow these steps to complete the process.
Step 1: Adding Your Application
You can add your application through one of the following methods:
- From the Main Dashboard: Click the Add App button.
- From the Sidebar Menu: Navigate to Applications and click the Add App button.
Upon selecting one of these options, you will be guided through a wizard to complete your application setup.
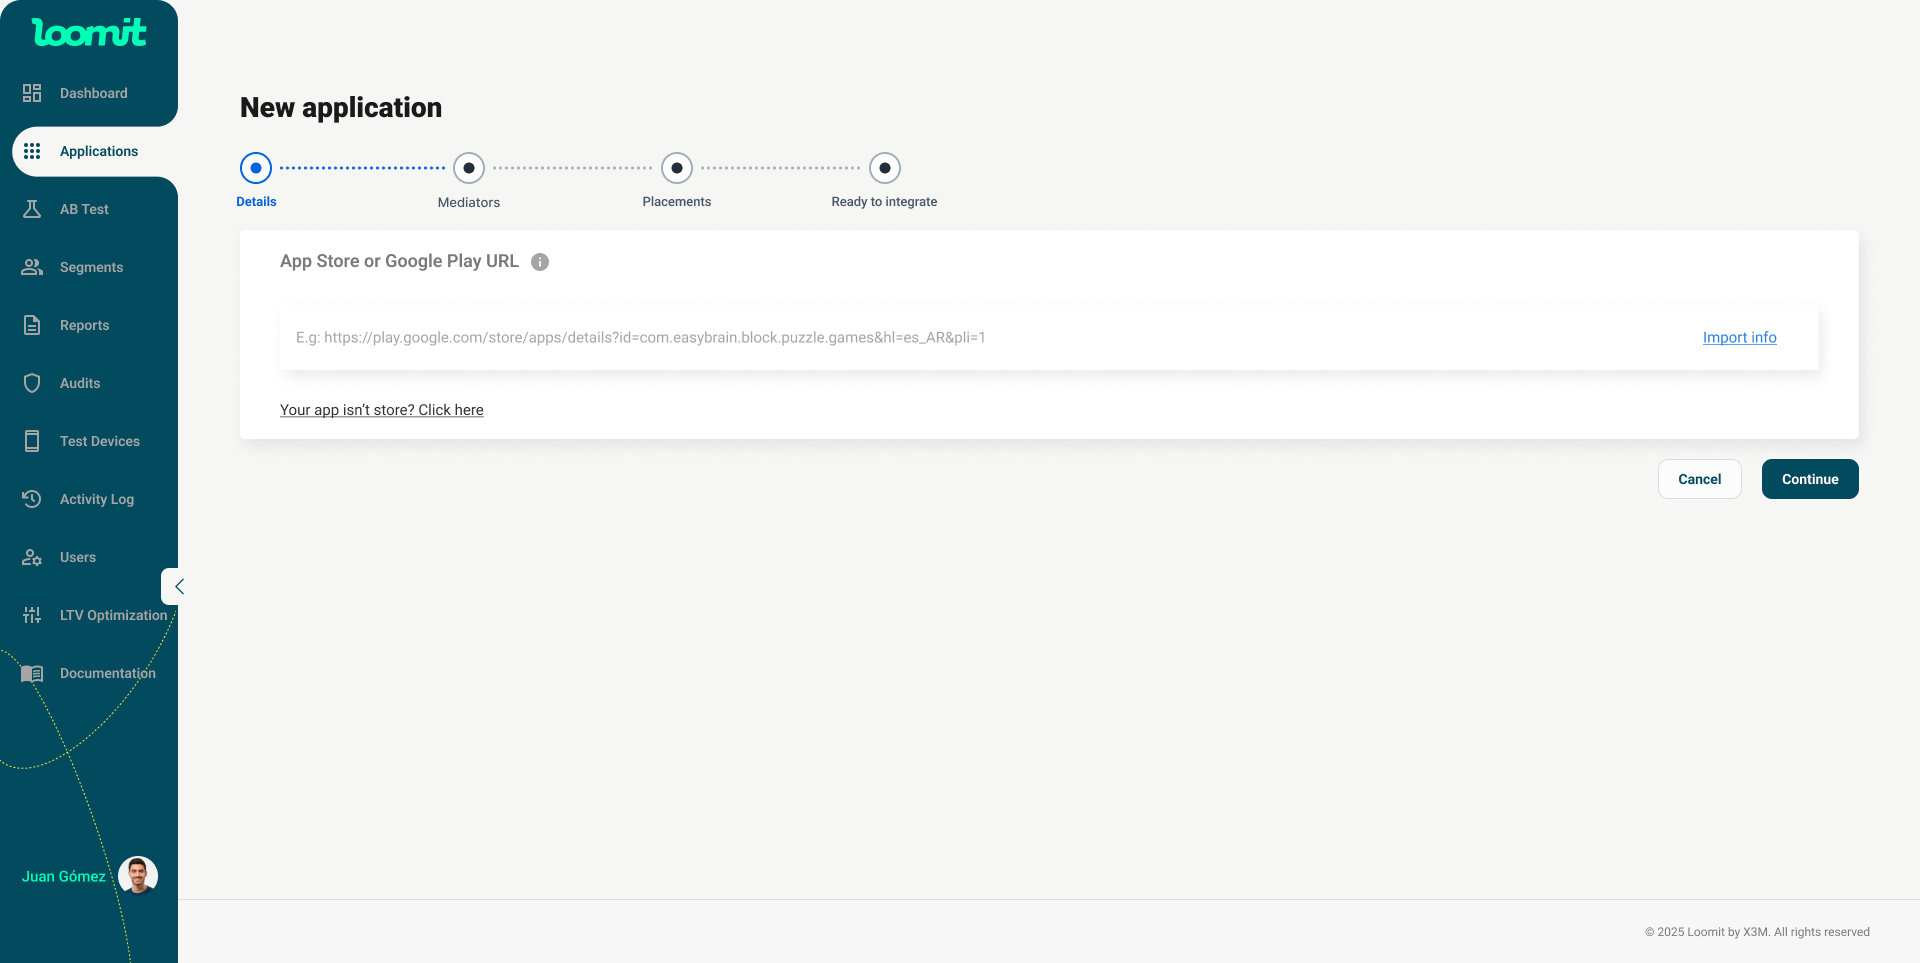
First Step in the Wizard: Application Store URL
- Paste your app’s store URL in the designated field (Google Play Store or Apple App Store).
- Press Enter or click Import Info.
- A preview of your app’s information will be displayed. Verify the details.
- If everything is correct, click Next to proceed.
Note: Not published yet?
If your app is not yet published on a store (Android or iOS), you can still configure it.
Click the link: "Your app isn’t in the store? Click here."
The wizard will allow you to proceed, and in the final step, you'll receive the necessary keys to run tests.
⚠️ Keep in mind that your app won’t be able to monetize until you have active mediators.
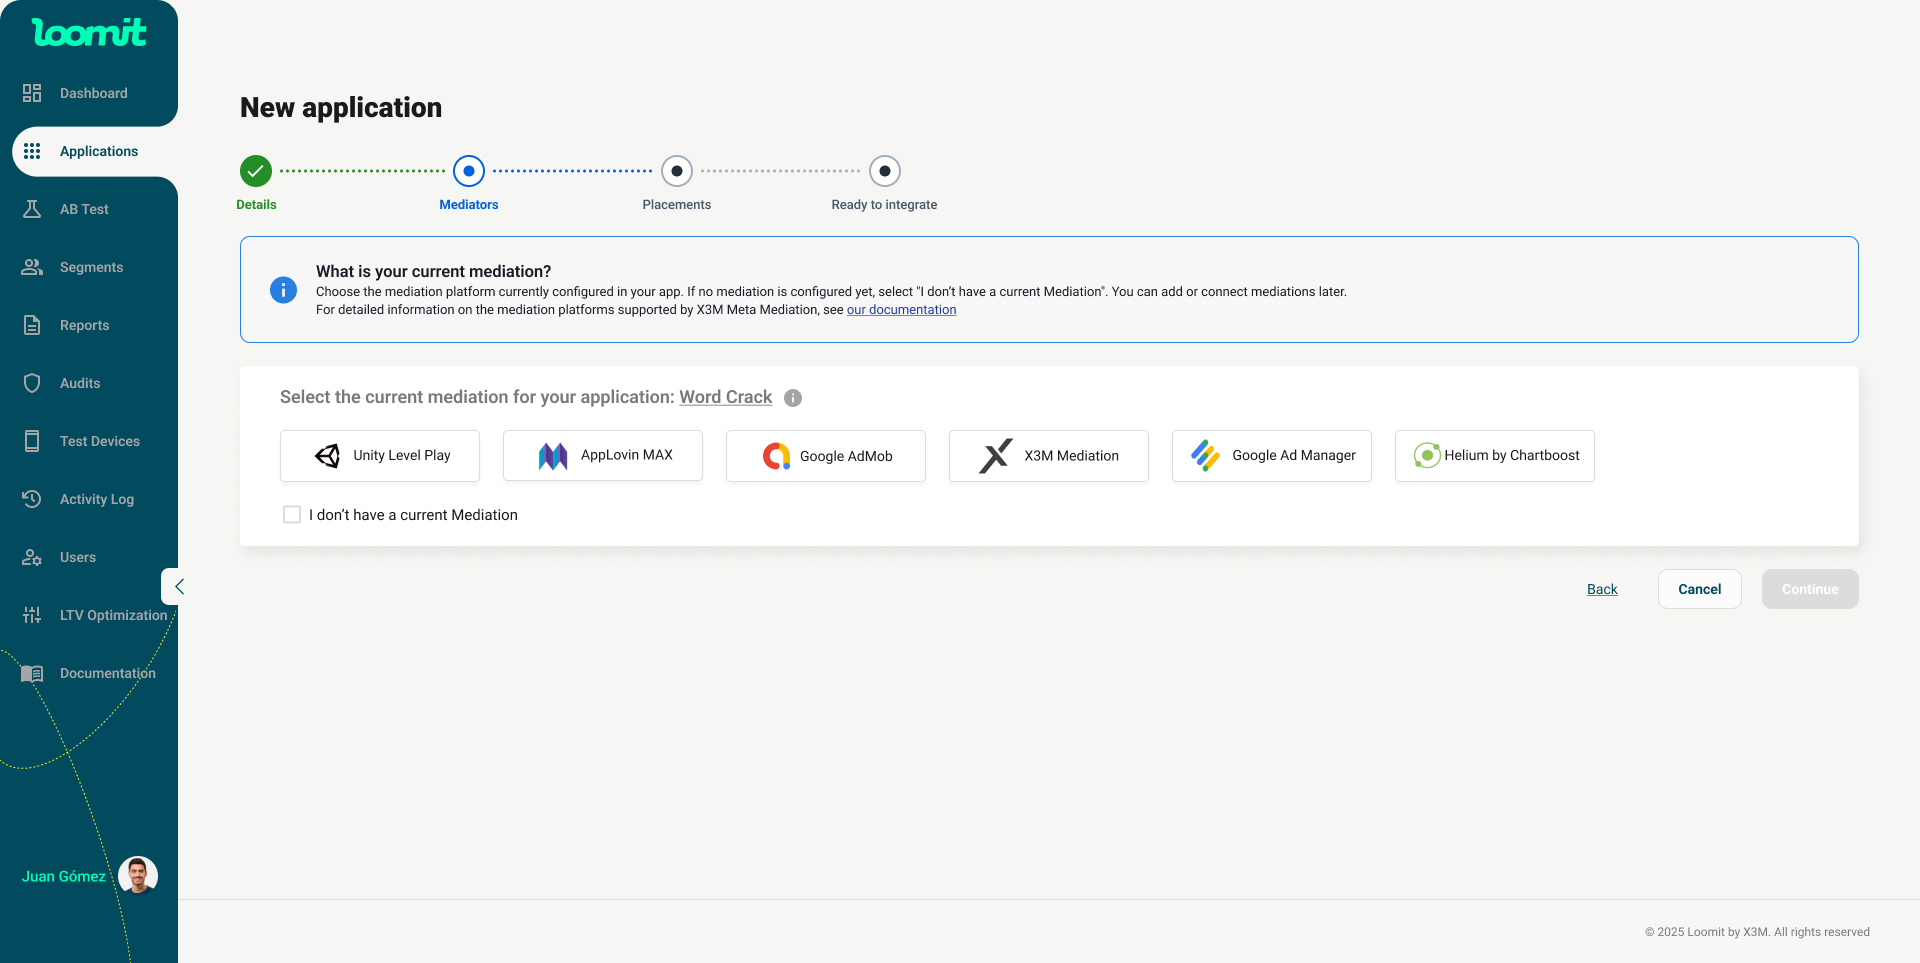
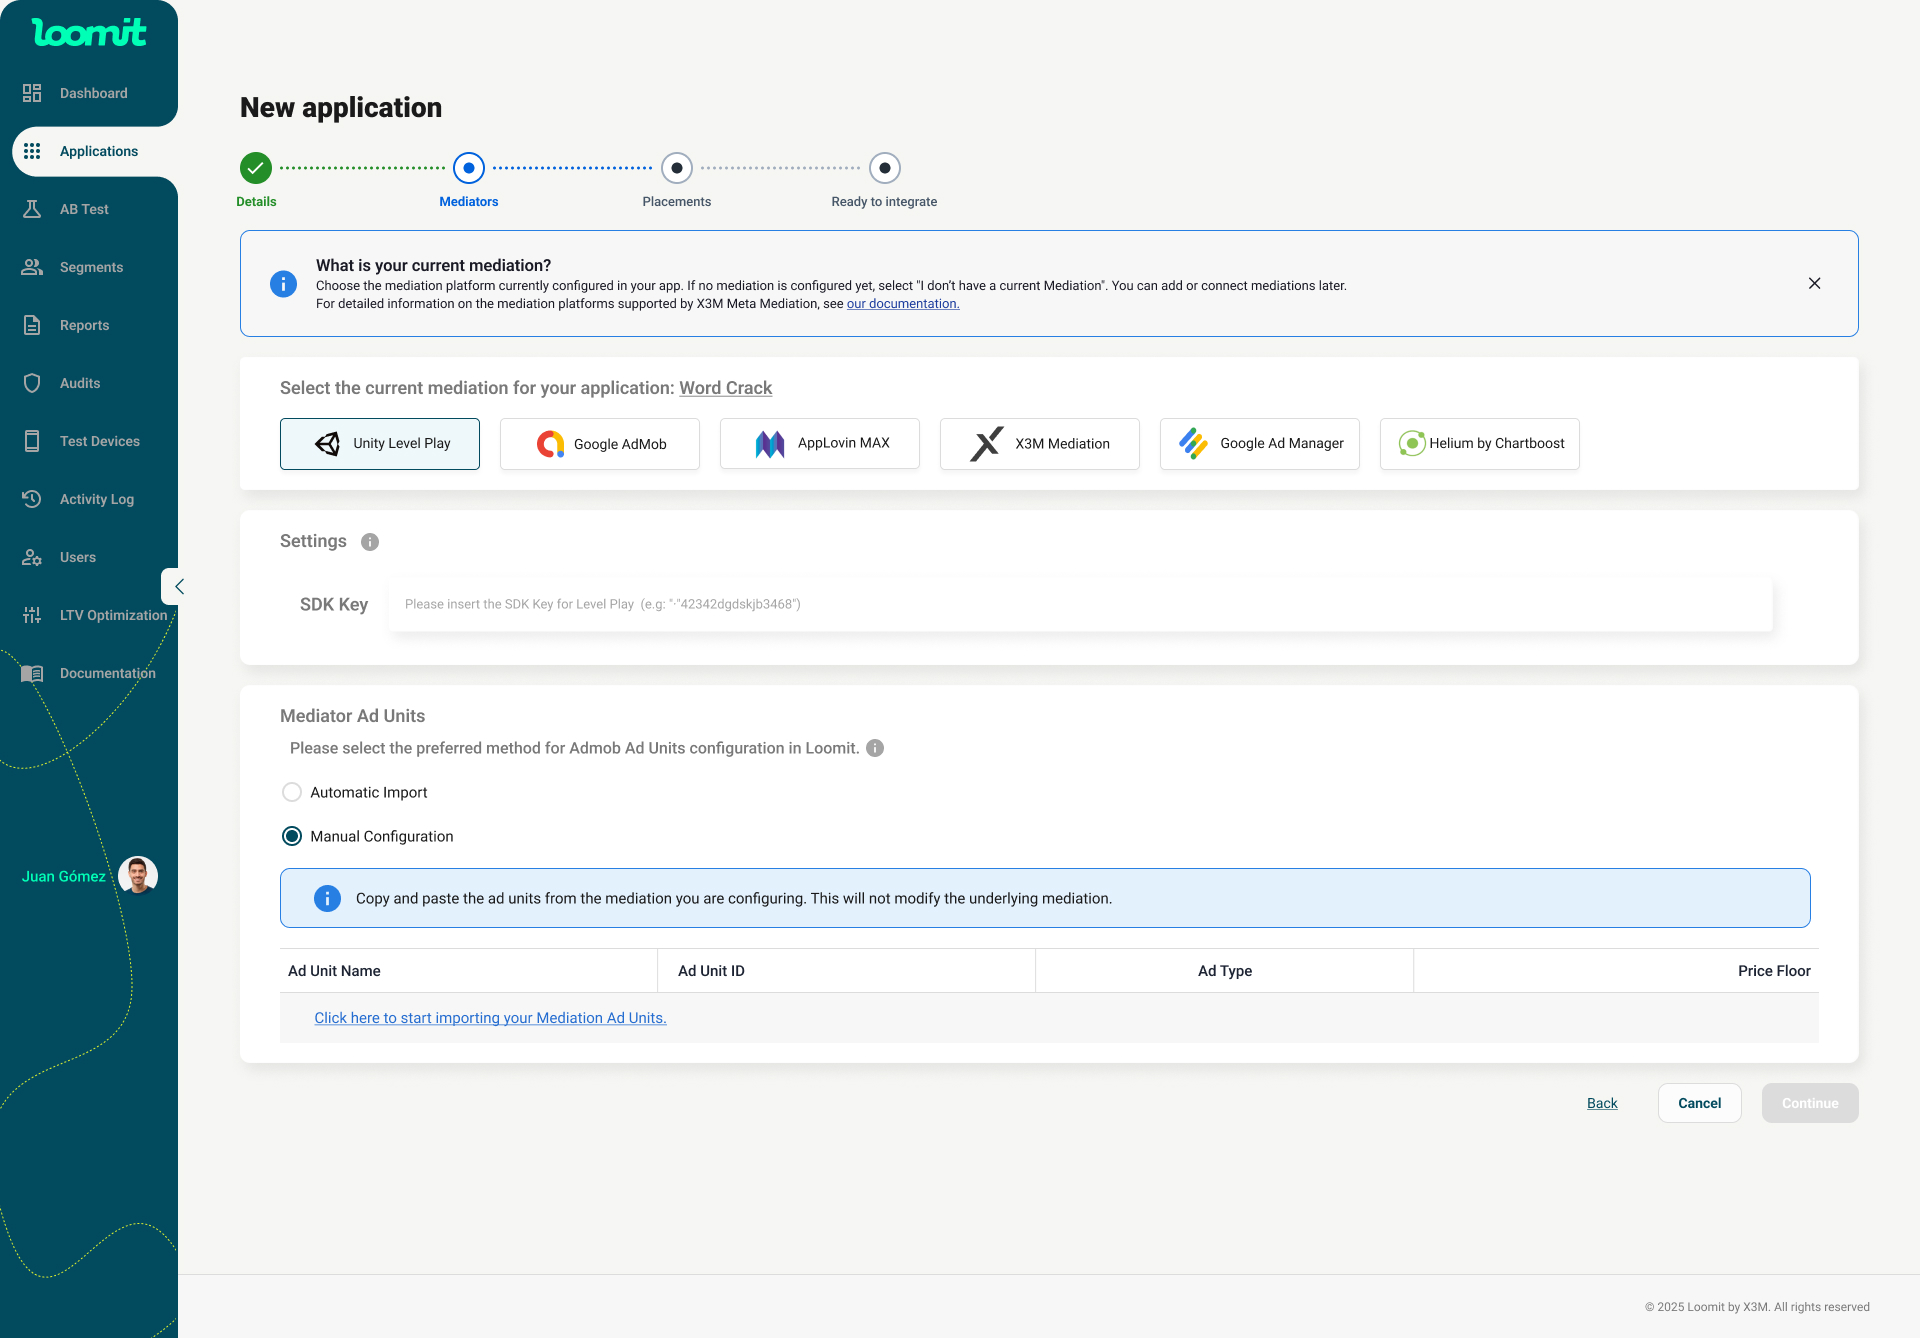
Step 2: Set Up Your First Mediation
Select Your Current Mediation Platform
- Choose the mediation platform currently configured in your app.
- No Mediation Configured?
- If no mediation is set up, select "I don’t have a current Mediation".
- You can add or connect mediations later by navigating to your application, selecting Mediators, and configuring your desired mediation platform.
Configuring the Mediation
Each mediator has unique parameters that must be completed.
Settings Keys
- Obtain the required keys from the selected mediation platform.
⚙️ Manual or Automatic Configuration
-
Automatic Configuration:
- Enter the required keys and import the information.
- The system will automatically retrieve the ad units from the underlying mediation platform.
- These ad units cannot be edited in X3M.
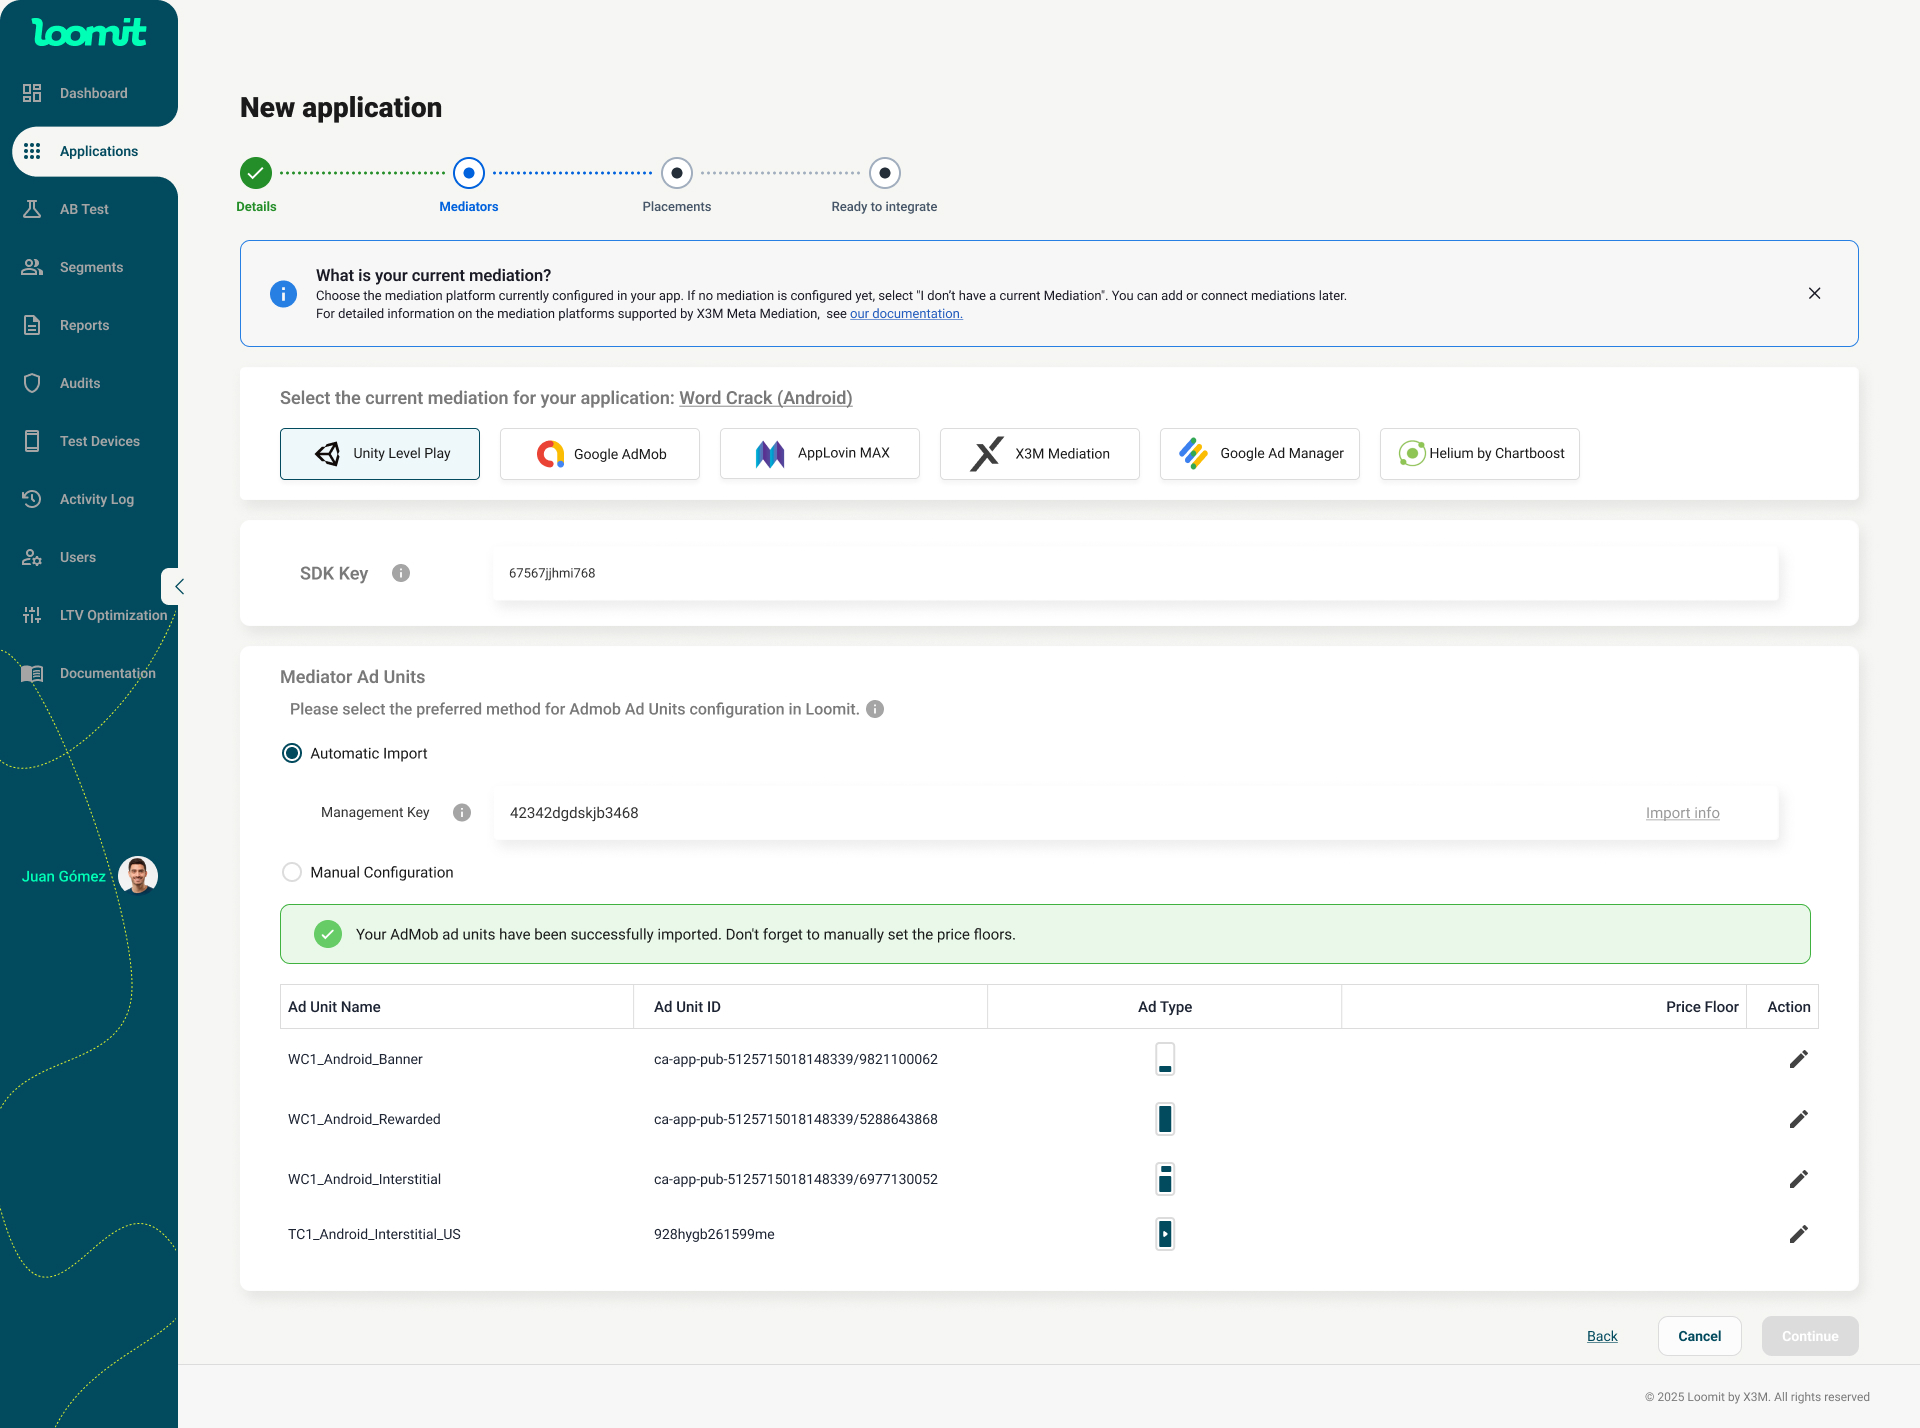
Why can’t ad units be edited?
- Editing ad units in X3M Loomit does not affect the underlying mediation platform.
- You can edit the ad units directly in the mediator, sync the changes in X3M, and the updates will reflect in the system.
-
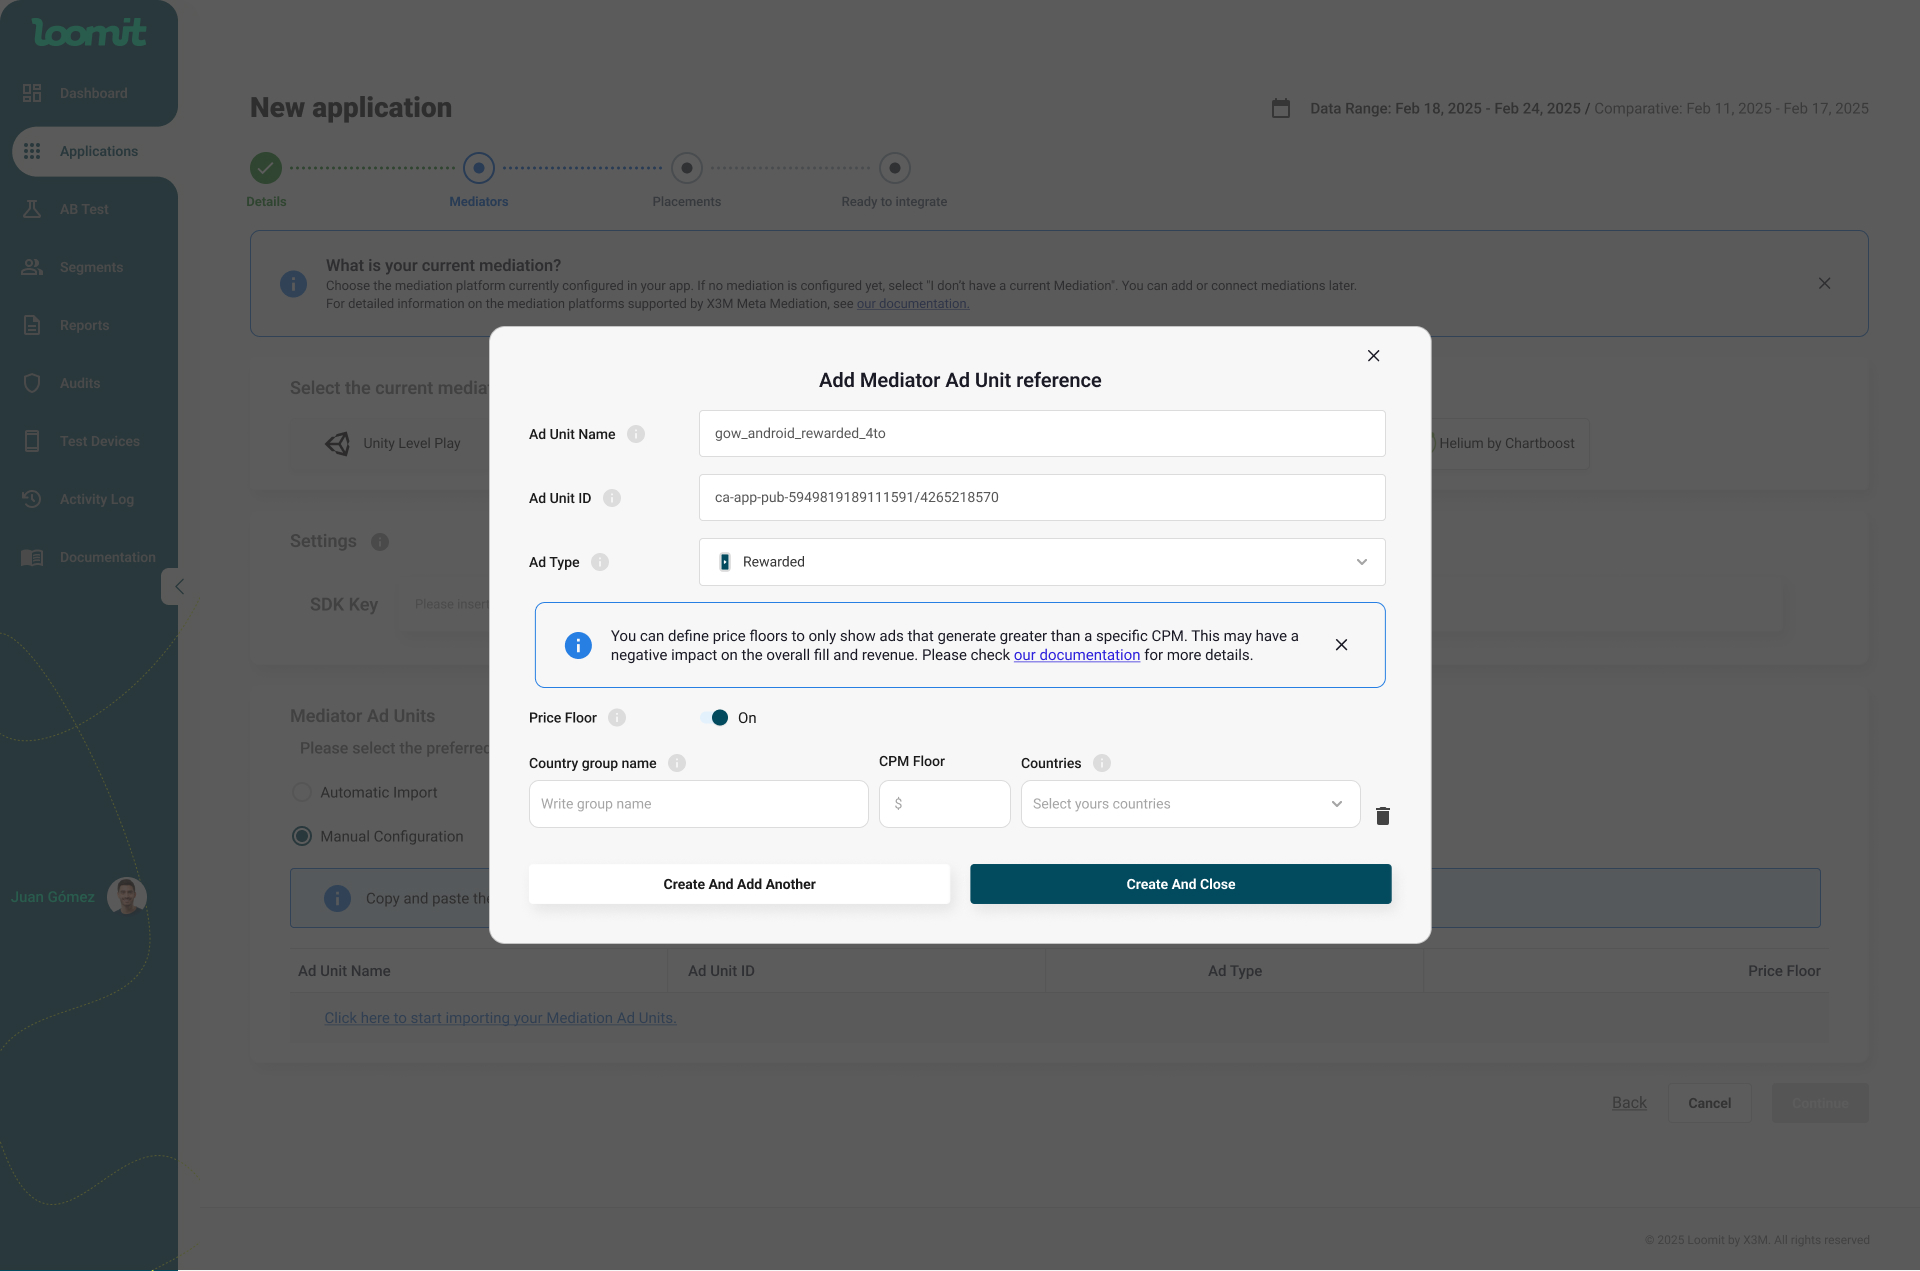
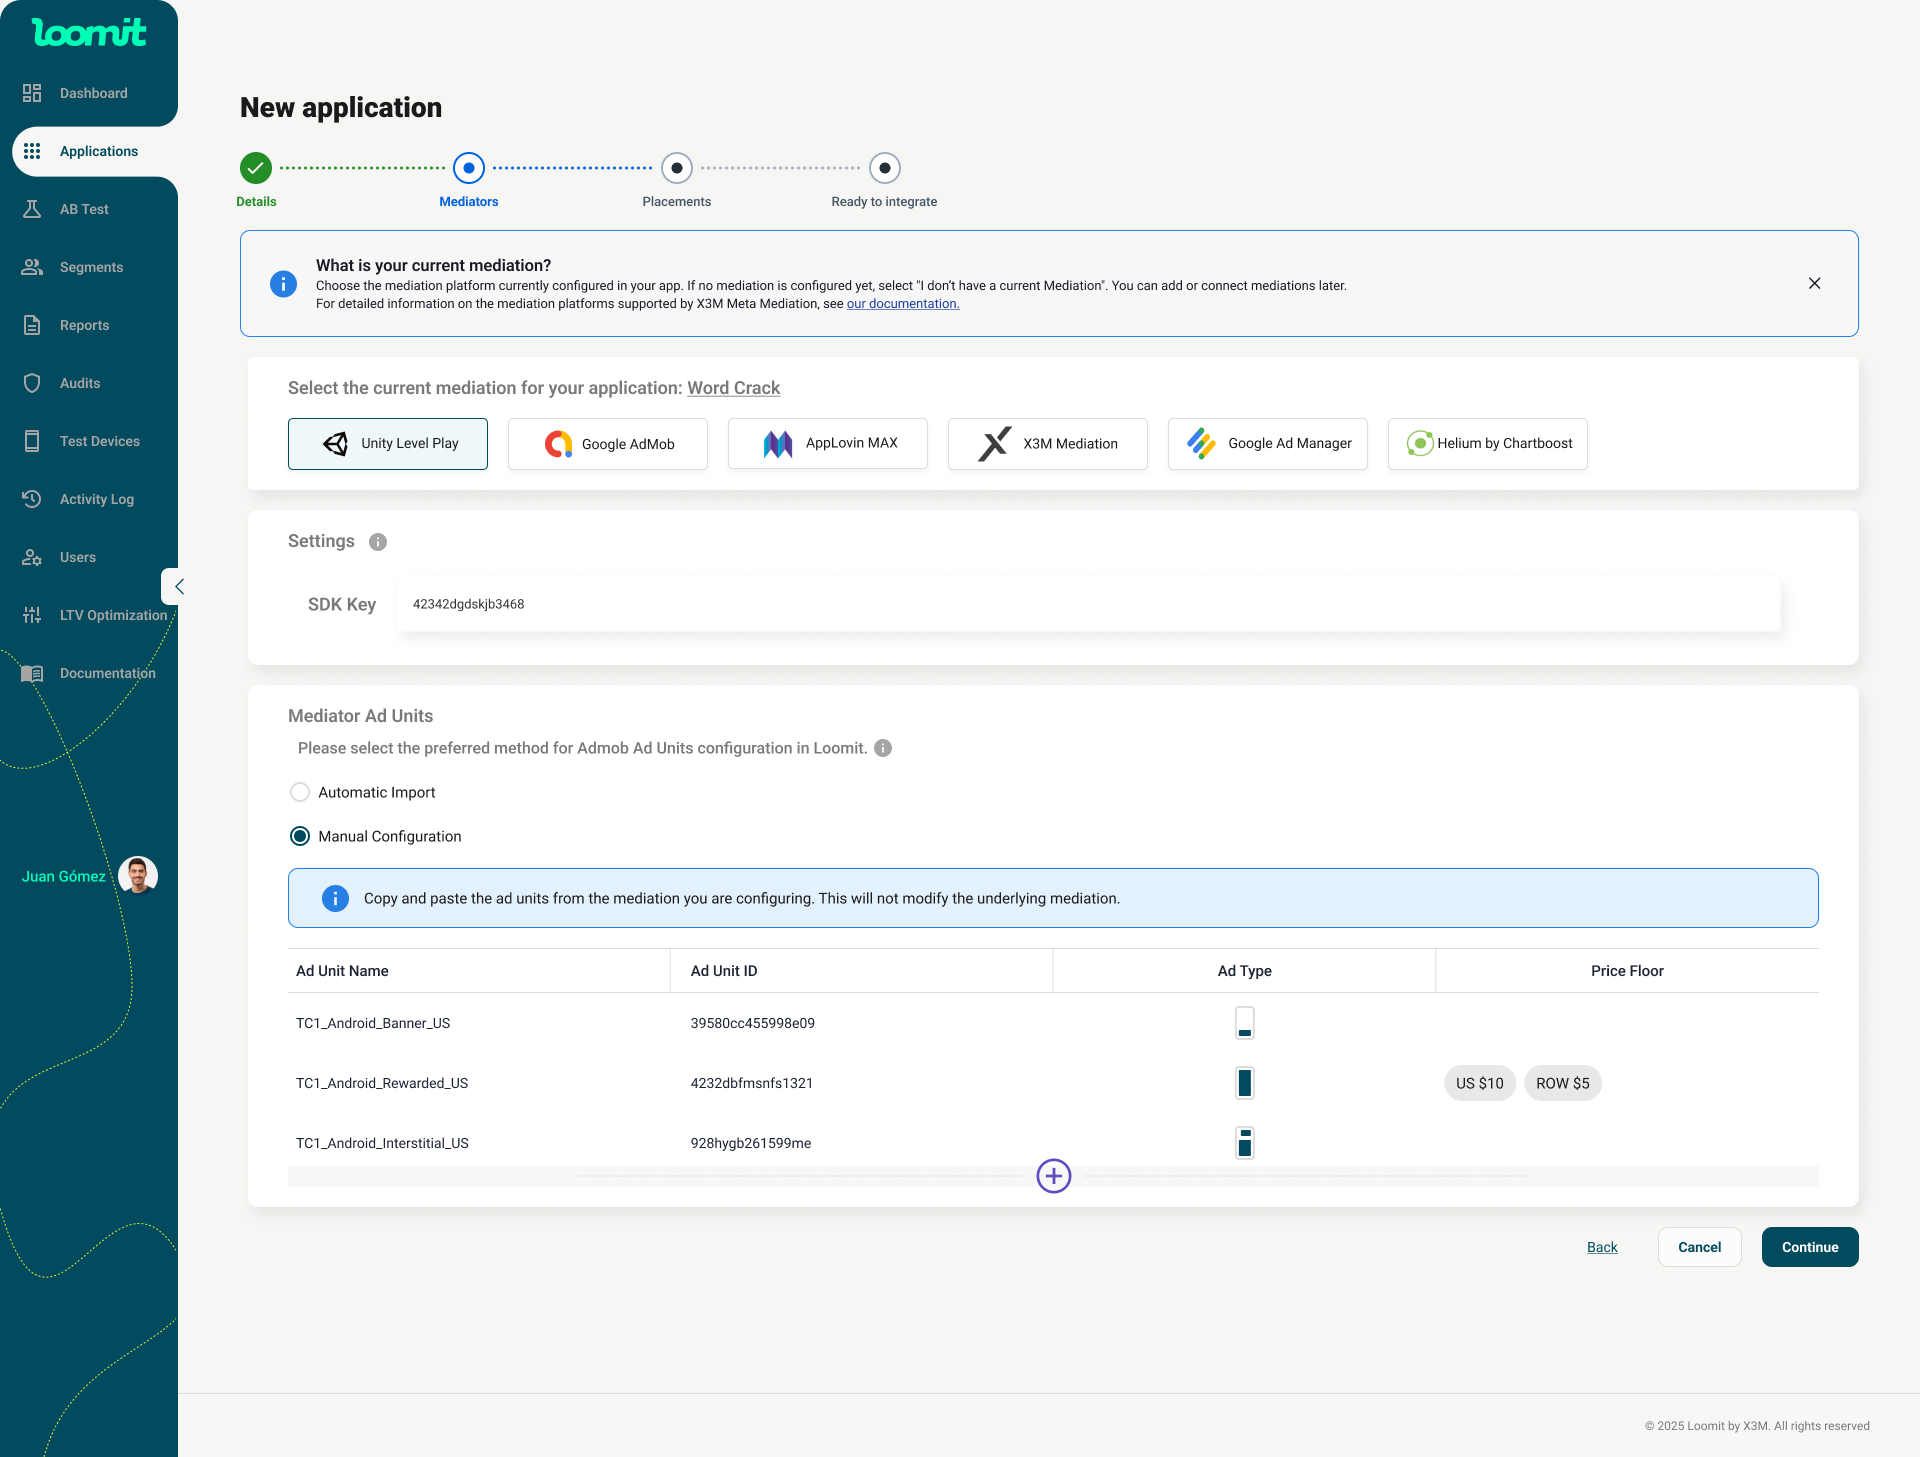
Manual Configuration:
- A blank table will be provided with an Add Ad Unit button at the bottom left.
- Use the modal to input the ad unit details exactly as they are configured in the mediator.
- After completing this step, click Continue.
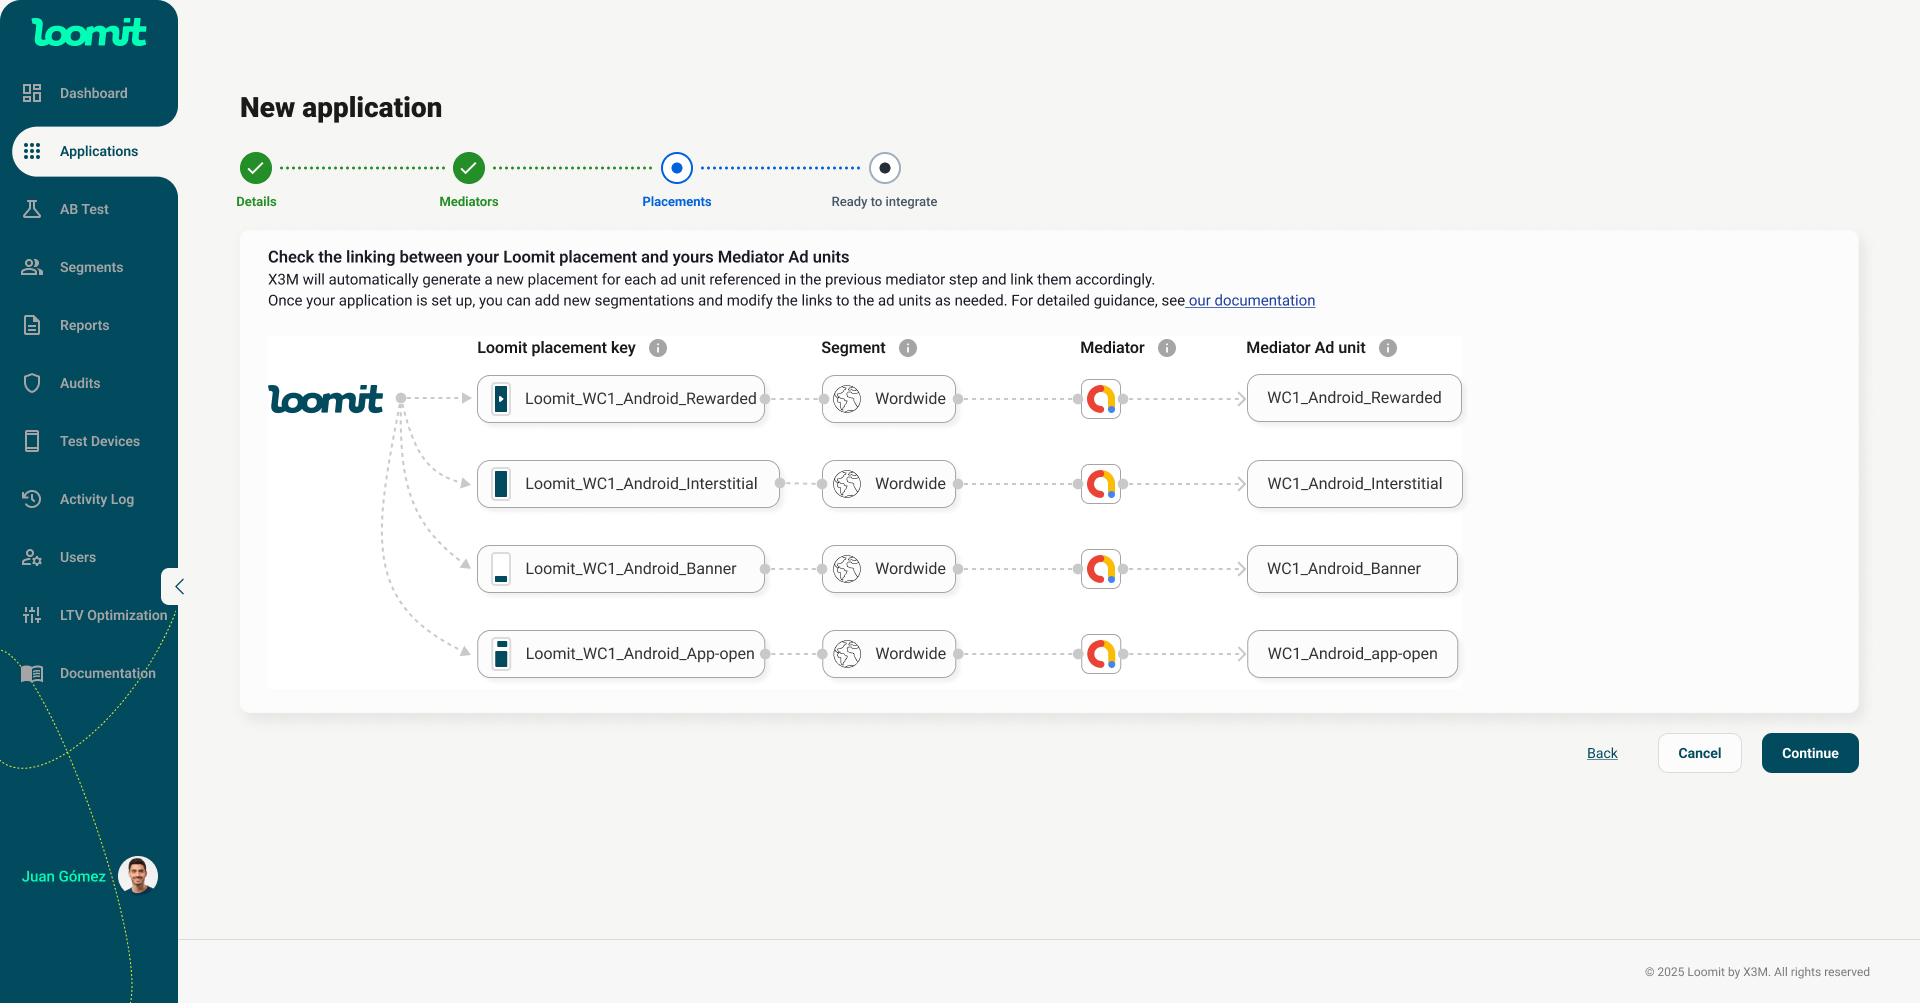
Step 3: Linking Ad Units with X3M Placements
-
Automatic Placement Creation:
- X3M Loomit will automatically generate placements for each ad unit configured in the previous step.
- This ensures a seamless integration, preserving your existing mediation configuration without requiring additional changes.
-
Future Optimization:
- In the future, you will be able to connect other mediators to further optimize and enhance your setup, maximizing monetization performance.
-
Preview Section:
- A preview of the placement configuration will be displayed for review.
- Click Create Application to proceed.
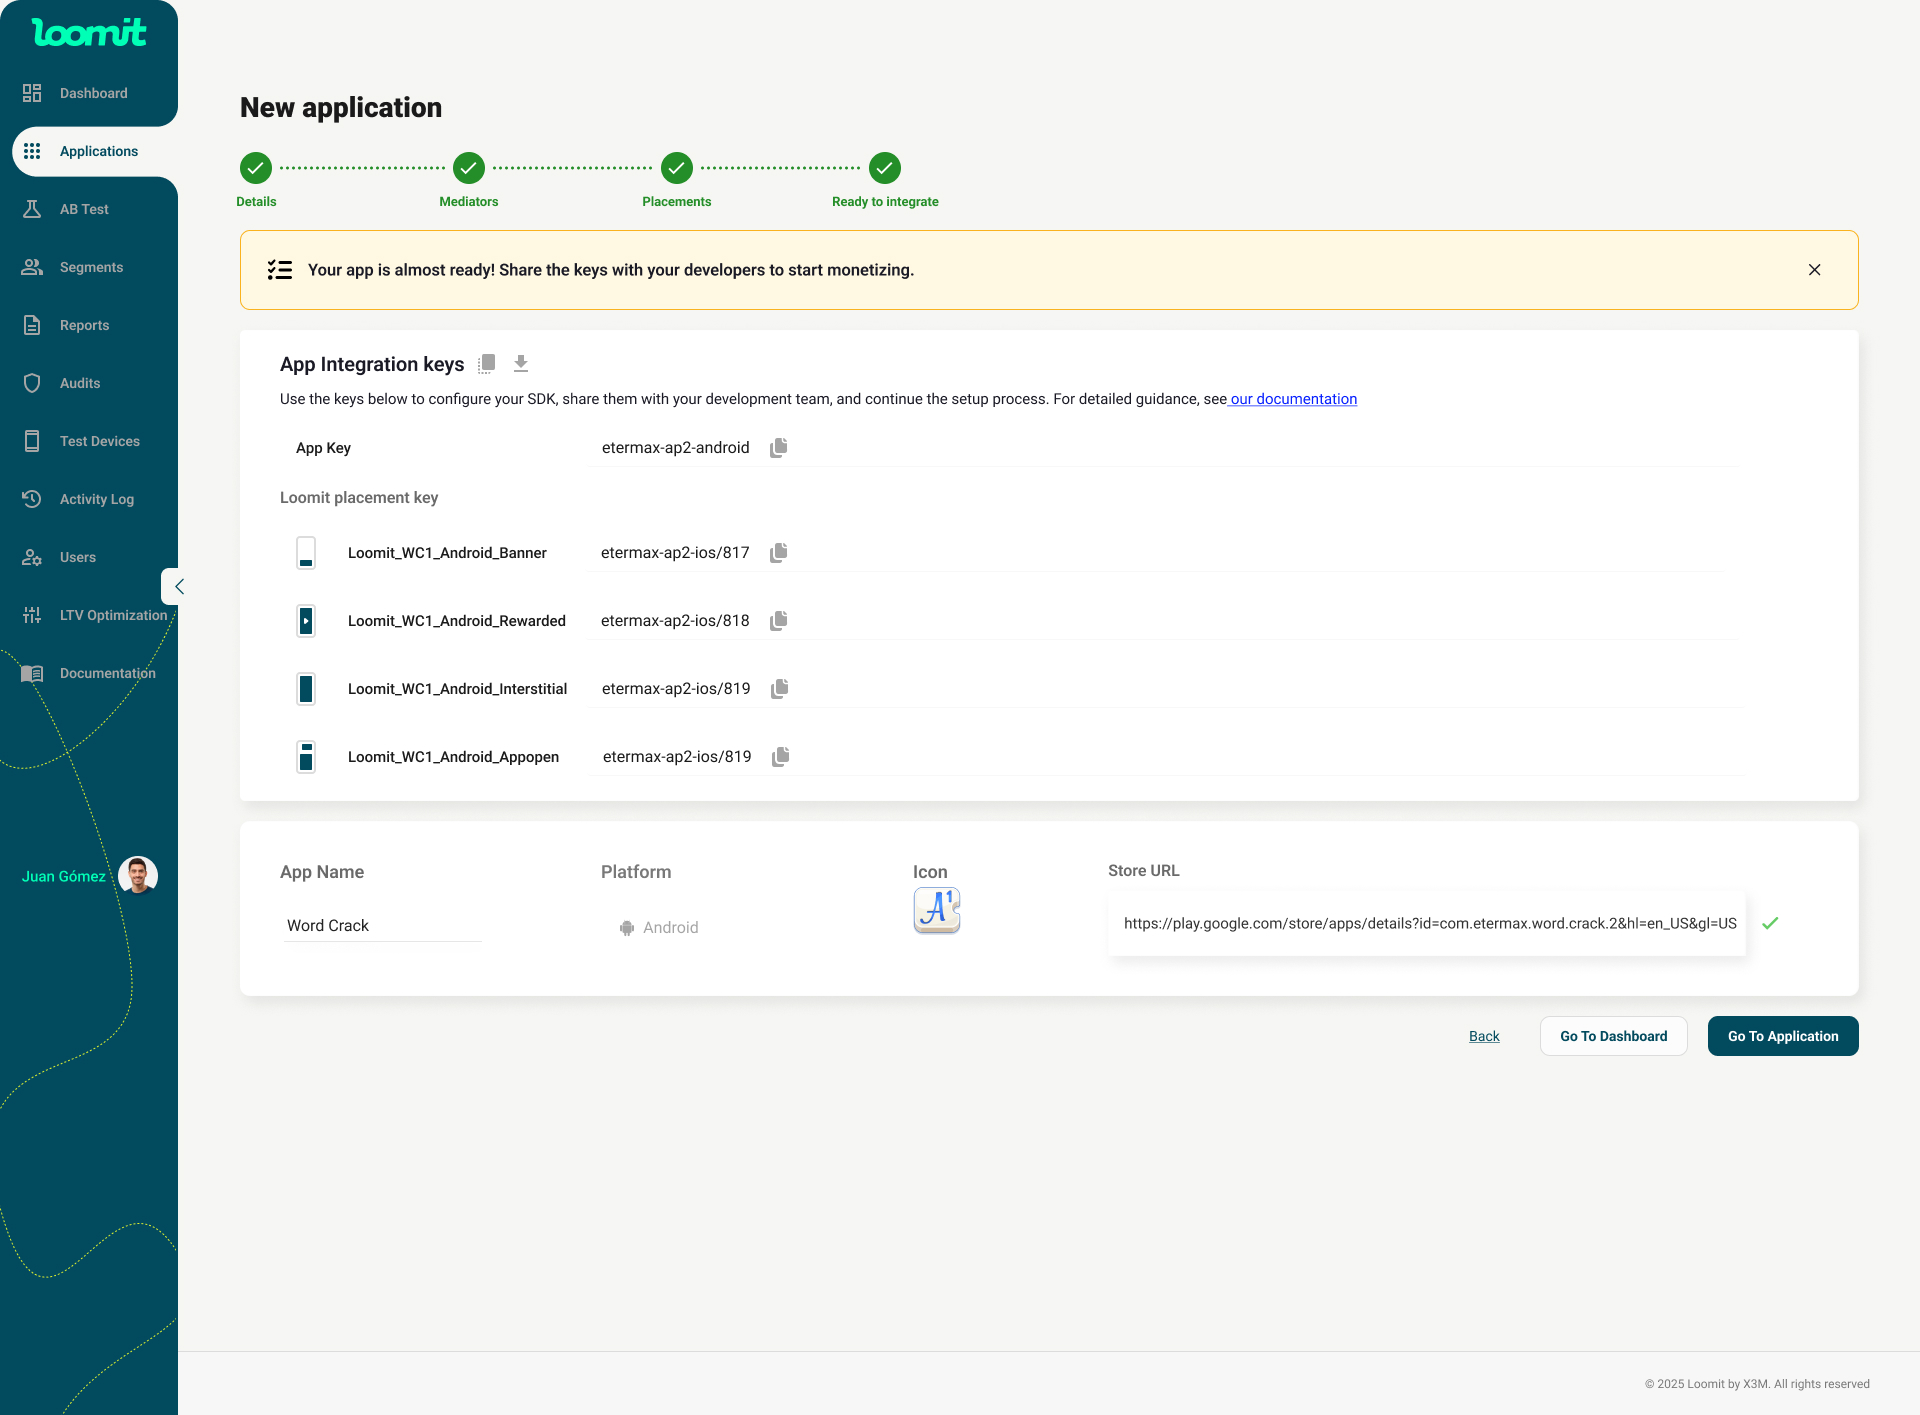
Step 4: Integrate the X3M SDK
In the final step, you will find:
- The keys required for SDK integration.
- Share these keys with your development team to continue the setup process.
- A summary of your application’s details.
By following these steps, you’ll have your app configured in X3M Loomit and ready to monetize effectively.
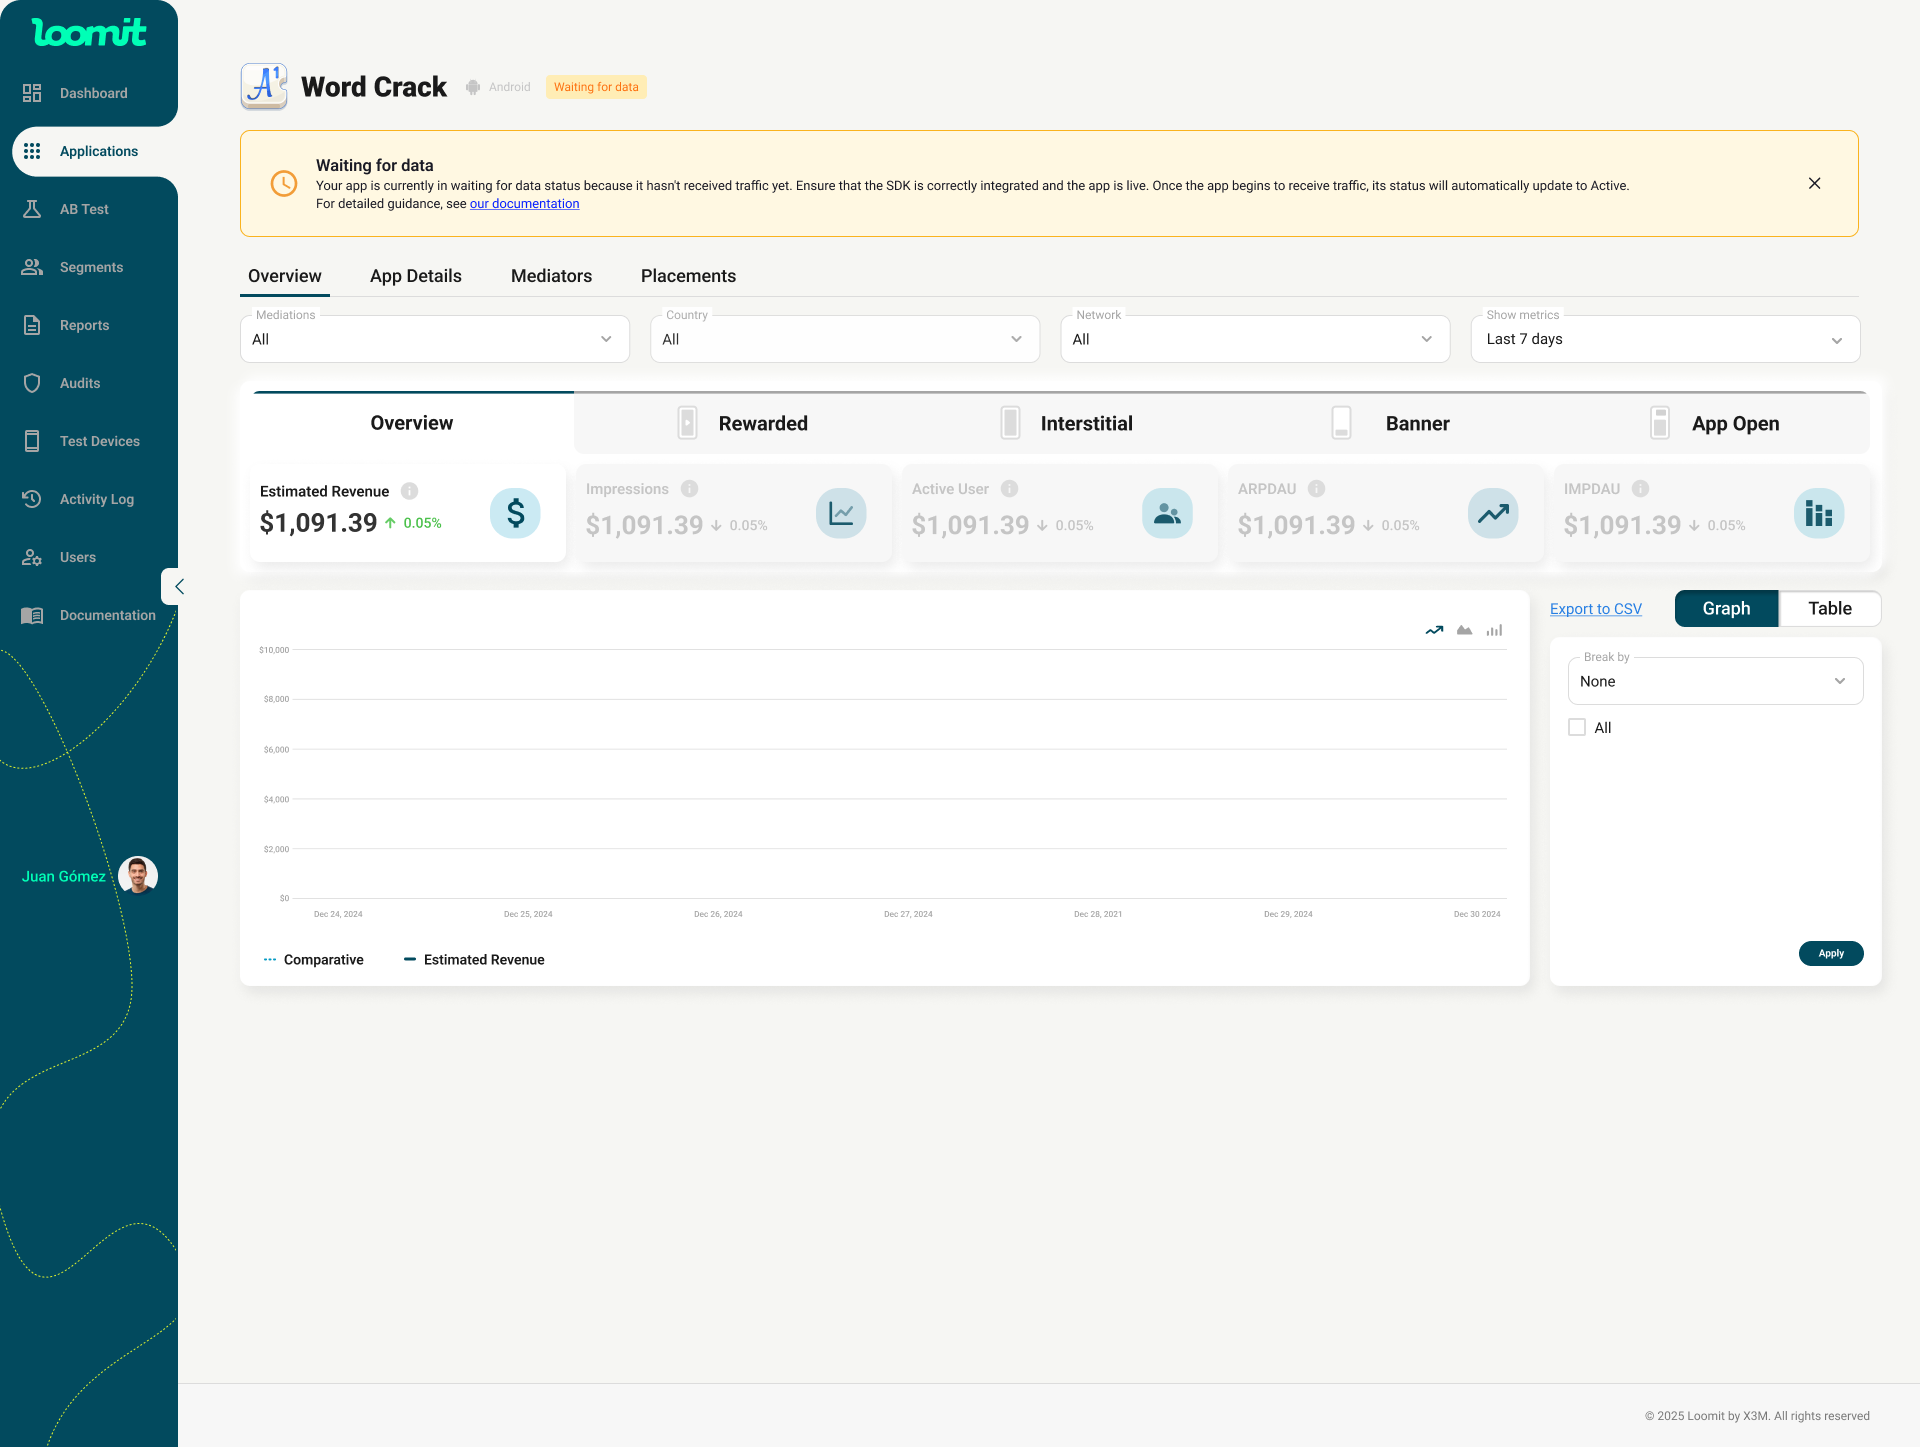
Step 5: View Results
- Once the configuration is complete, you can access the Dashboard to track key monetization metrics for your application.
- For deeper analysis, the Reports section provides detailed insights to help you refine your strategy. [Link to documentation]
Now that your application is monetizing, you can explore the tools Loomit offers to further optimize your revenue.