Instances
Instances represent each connection the mediator establishes with a partner to determine the final selling price. In the Instances tab of the Application section, you can visualize, create, delete and edit instances for a specific app.
Access this section from the Main Menu, the Edit Waterfall table, or an A/B Test configuration.
For simplified identification, a search tool enables you to find and filter instances.
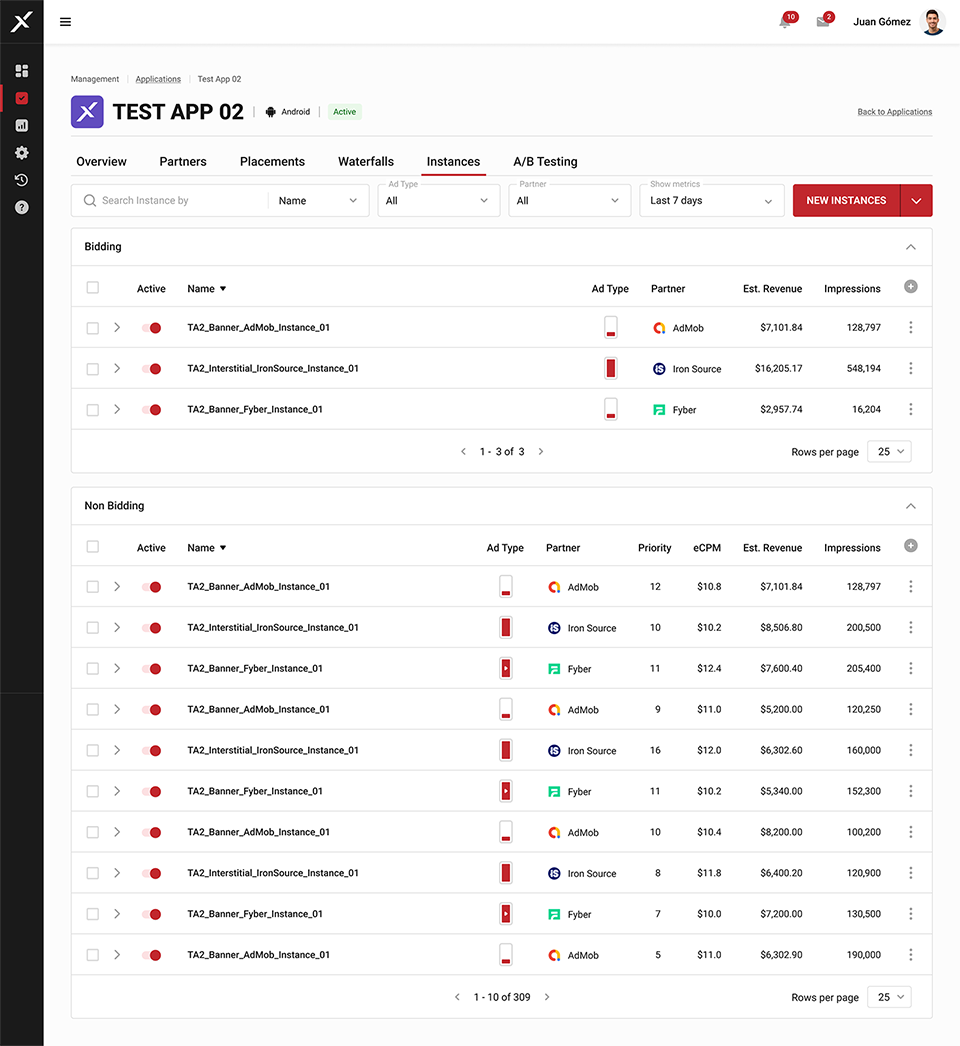
The list view displays all instances for a specific app, along with corresponding information. You can edit the time frame for a metrics, and activate, deactivate, delete, and clone instances. The arrow button expands each instance to show related information, such as segments.
Creating an instance
To create an instance, click on the NEW INSTANCE button in the upper right-hand corner.
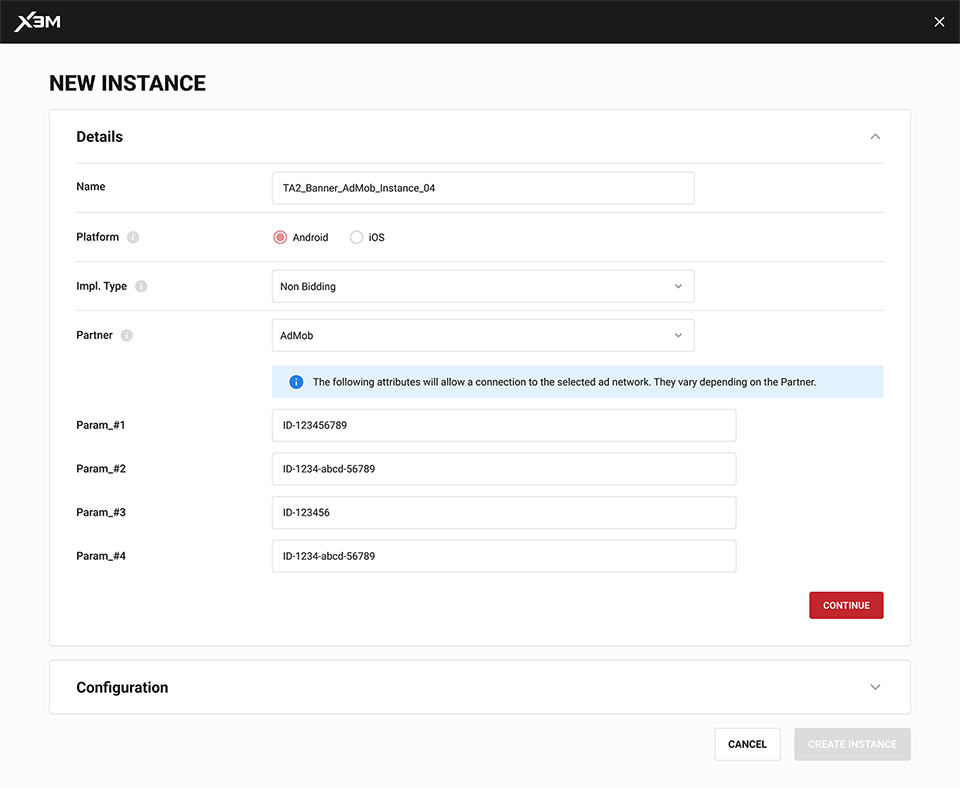
Fill out the requested details, including the implementation type. To determine this, you can ask yourself the following question: Is this instance bidding?, meaning it is meant to be a part of a real-time auction, Or non-bidding?, meaning it will be part of a waterfall of predetermined prices Different partners will be available depending on your selection.
You will be asked to choose a partner and provide their details, which you can retrieve from their website.

Next, set up the configuration. You can assign a priority to this instance. Remember, the lower the number, the higher the priority. With eCPM, you can estimate the price per thousand impressions expected for this ad. Finally, you have the option to limit this instance to existing geographic or custom segments.
Editing instances
To edit an instance, click on its name in the list view.
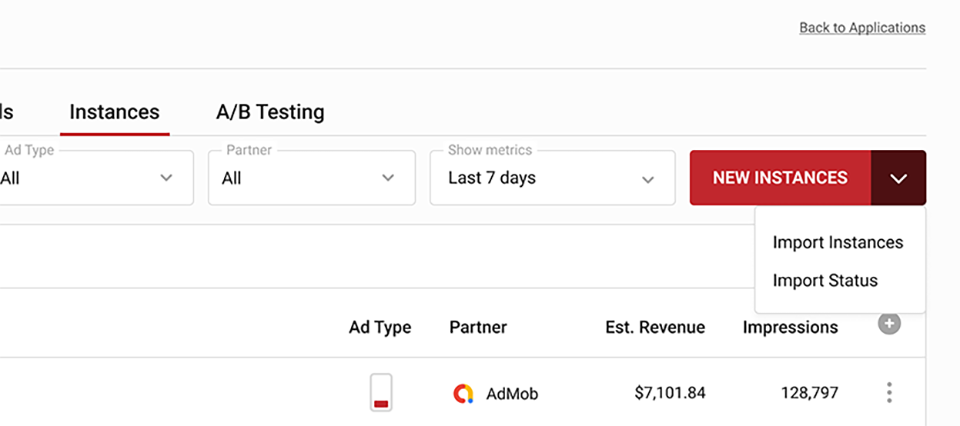
Importing instances
X3M allows importing instances via CSV files, either from a mediator to X3M or to X3M and a specific partner already connected to the platform.
Access this feature from the Instances section within an application. Click on the dropdown menu of the NEW INSTANCE button to find Import Instances and Import Status links.
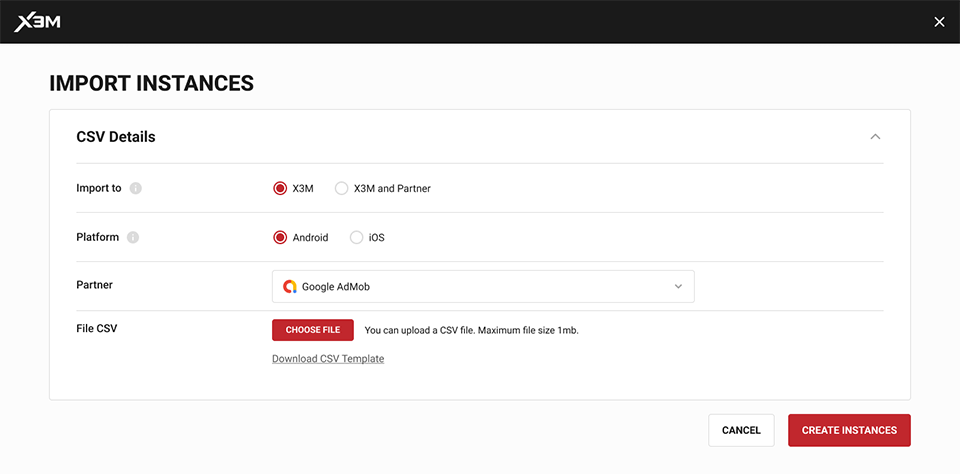
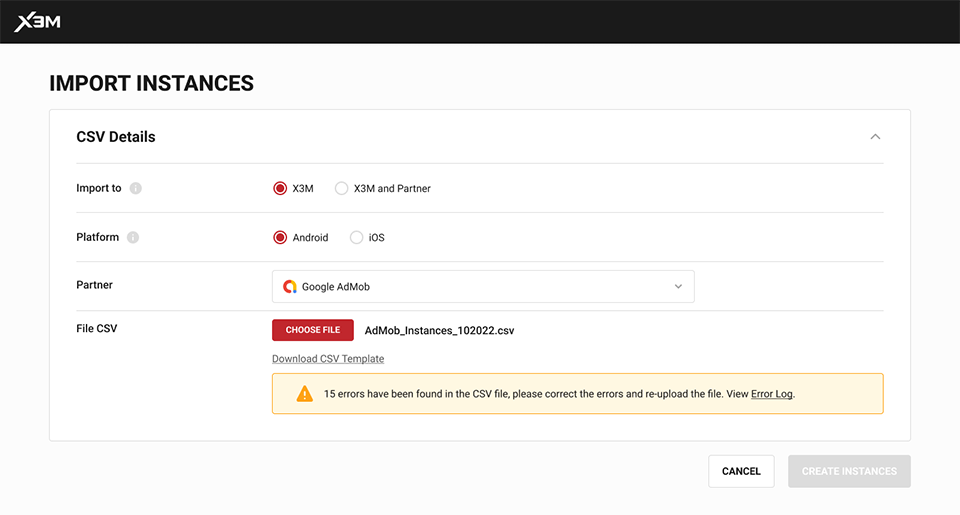
After clicking Import Instances, establish import details. Specify the destination (X3M or X3M and Partner) and choose the platform and partner. Select the CSV file to upload (up to 1MB), ensuring it follows the provided template.
 After uploading, check the import status. If successful, instances will be available; if errors occur, review the error log, correct the CSV file, and reupload.
Then, you will have to select the partner for which you are importing the instances. This will also determine the template you will download.
After this, you must choose the CSV file you wish to upload, which can weigh up to 1MB.
As mentioned above, you will see a link to download a CSV template. This template varies depending on the choices made previously. Sticking to the format and columns in the template is recommended. Otherwise, the import might fail.
Once the CSV file has been selected, you will see the file name to the right of the CHOOSE FILE button. If everything seems to be correct, click on CREATE INSTANCES.
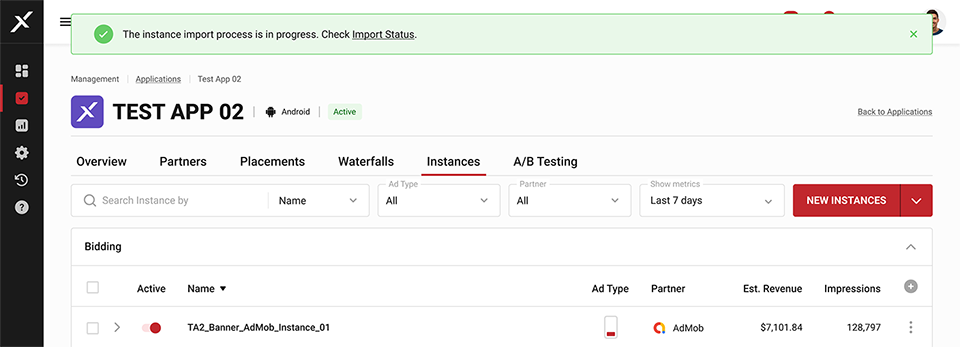
If the chosen file is correct, you will be directed to the screen that features the list of instances. You will receive a notification saying that the import is in progress, and that you may check its status in the section.
However, if the chosen CSV file has errors you will receive a notification specifying the number of errors and a link to the error log. In this section, you will see the errors in detail as well as their location, allowing you to edit the file so you can re-upload it. _The system will not import the instances until the CSV is in the correct format.
Once the file has been corrected, select it and click on CREATE INSTANCES. If it does not have errors, the process will carry on as explained above. However, if the file still has errors you will have to repeat the previous step.
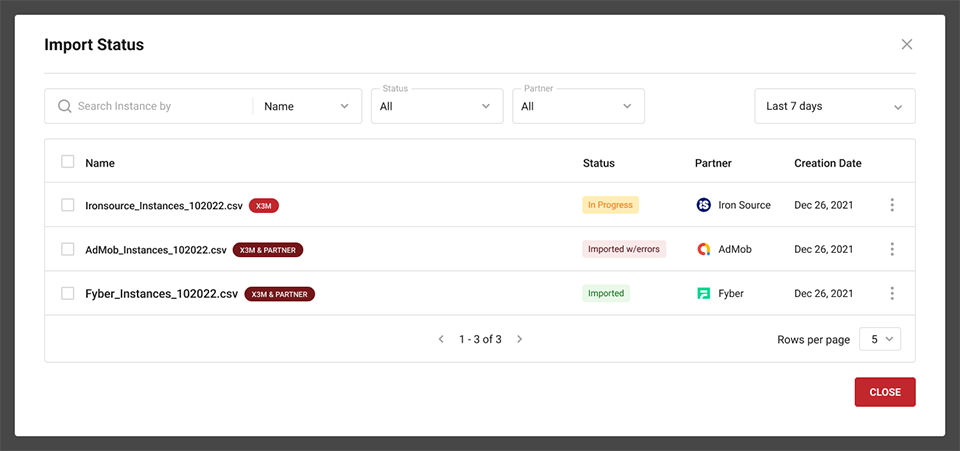
Import Status
Check the status and results in the Import Status section, accessed through the dropdown menu on the NEW INSTANCES button. View a list of imports with details such as CSV file name, status, partner, and creation date.
Possible statuses are:
- **In Progress
- **Imported
- **Imported w/Errors.
- Error
There is no specific status for successful creation, but you will be able to see the number of instances created reflected.
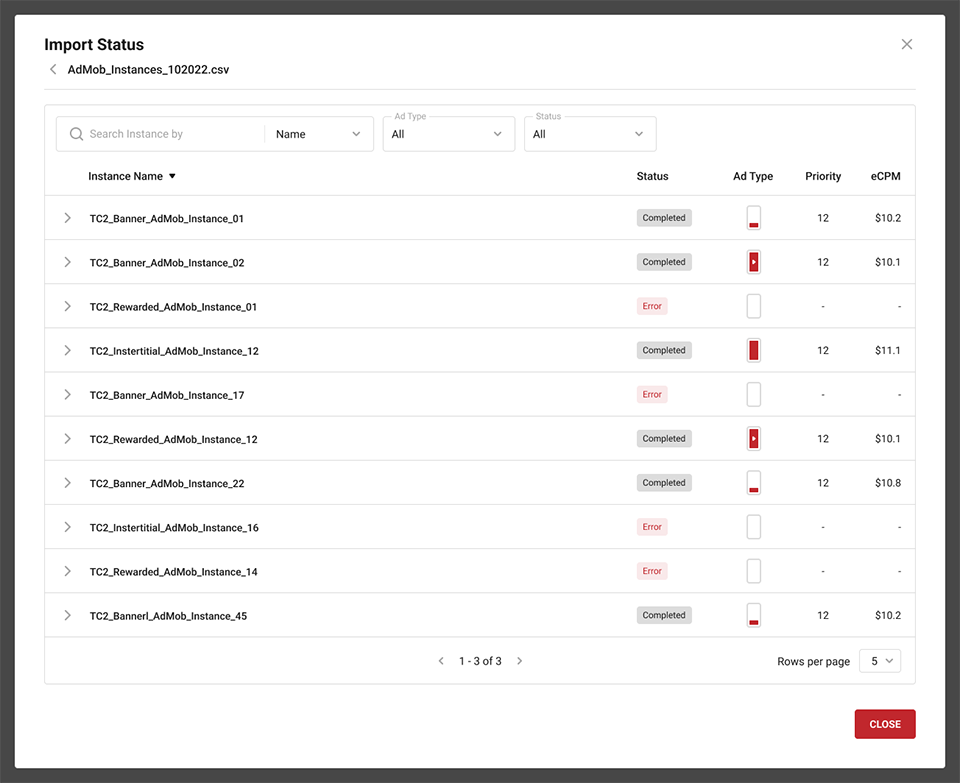
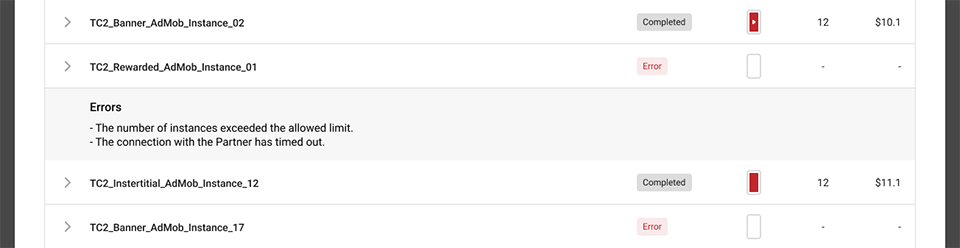
For instances with errors, click on the arrow to view details. Error types depend on the import type and are specified below.