AdMob
This guide will show you step by step how to connect AdMob with X3M platform.
Connection at the Import Instance Level
To connect AdMob at the Import Instance level we will need the following mandatory parameters and please ensure that your AdMob account language is set to Spanish (Latin America) before using this feature:
- Registration Email
- Password Registered
- Automation Seed
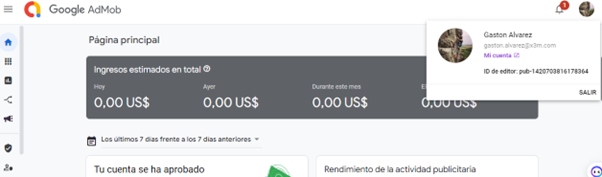
The parameter 'automation_username' corresponds to the email account associated with the user's registration in AdMob. You can locate this information by clicking on the avatar, as demonstrated in the image below:
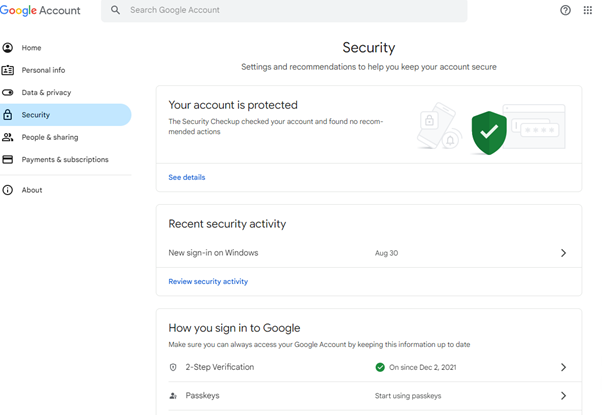
The 'Password Registered' parameter represents the password utilized for accessing the AdMob account. As a security precaution, X3M encrypts the password and refrains from disclosing it to third parties. The final parameter requiring configuration is the 'automation_seed.' To retrieve it from your AdMob account, navigate to 'My Account.
In the new tab, find Security then go to 2-Steps Verification:
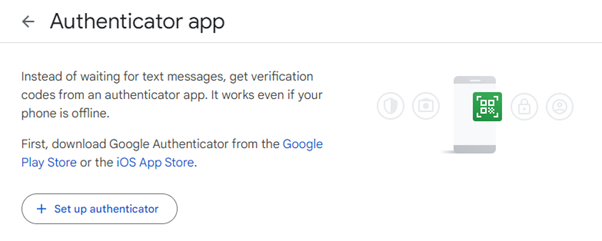
After logging in to your email account, you'll be prompted to access the configuration panel. From there, navigate to the 'Authenticator app' option and click on the 'Set up authenticator' button.
- If you have an Android device: After scanning the QR code using your mobile phone's camera, you'll have the option to copy the seed code. It should resemble the following format:
otpauth://totp/Admob:Admob%20Dashboard?secret=XXXXXXXXXXXXXXX&issuer=Admob&algorithm=SHA1&digits=6&period=30
Complete the 'automation_seed' parameter required by X3M with only the 32-character text following 'secret=' identified with the XXXXXXXXXX.
- If you have an Apple Device: We recommend downloading the 'QR Scanner' app to properly scan the QR code using your mobile phone's camera. You'll have the option to copy the seed code. It should resemble the following format:
otpauth://totp/Admob:Admob%20Dashboard?secret=XXXXXXXXXXXXXXX&issuer=Admob&algorithm=SHA1&digits=6&period=30
Afterwards, you need to scan the code with your authentication app, proceed to the AdMob page, and enter the code displayed on your phone.
It's important that when entering your authentication code, you are logged in to the app, Chrome, and AdMob with the same business account.
Connection at the Audits Level
To connect AdMob at the Audits level we will need the following mandatory parameters: Token, Refresh Token, Client Id, Client secret.
To fill Client ID & Client Secret:
- Access Google's API Manager.
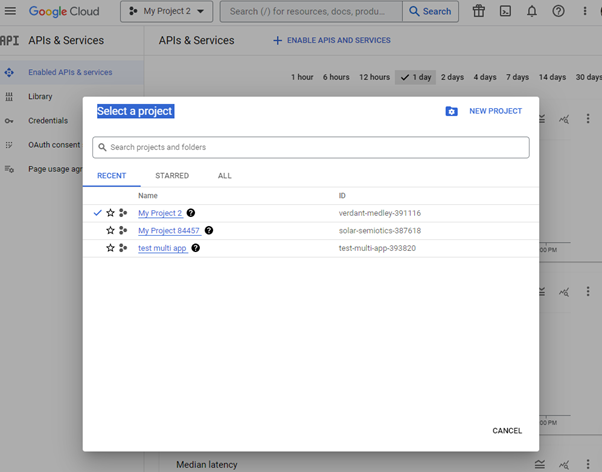
- Click on the API Project drop-down located at the upper-left corner of the page.
- Select either 'Create a project' if you haven't done so already, or choose the project previously created for this application.
Sure, here it is:
- If you're creating a new project for this purpose:
- Provide a Project name, Billing account, and Location in the dialog box that appears.
- Click 'Create'.
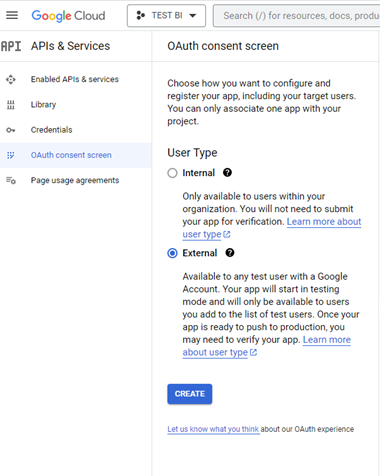
- In the left sidebar, select Credentials.
- Then, select the OAuth consent screen tab.
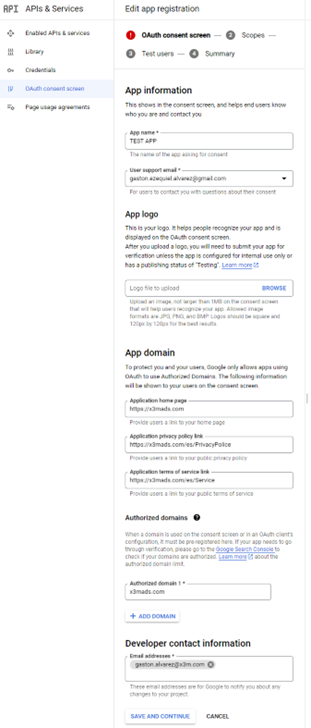
Press the "create" button and fill in the application registration details as shown in the example below:
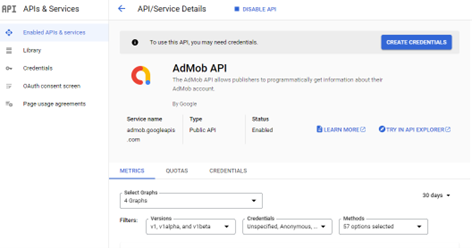
Complete the process and return to the main screen. In the left sidebar, select "Dashboard," and then go to "ENABLE APIS AND SERVICES.”

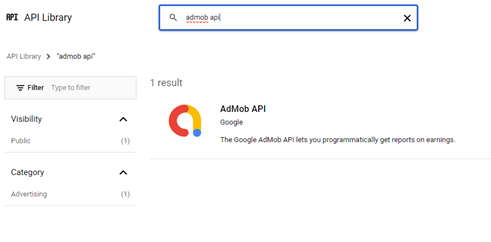
Next, enable the AdMob API:
Upon enabling ir, you will see the following screen:
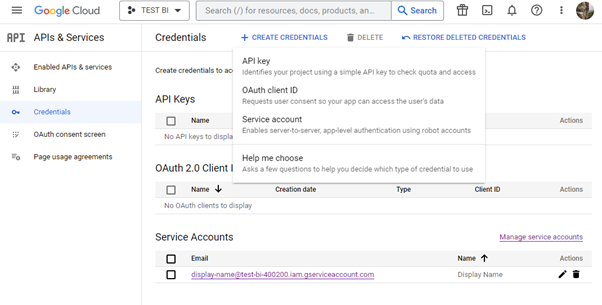
Select the credentials tab in the left sidebar. Click the Create Credentials drop-down and select OAuth client ID:
Select Web application, and provide a name for your app. In the fields below, you must enter https://developers.google.com/oauthplayground for at least one Authorized redirect URI.
For example: Authorized JavaScript origins: https://YOUR_NAMESPACE (Optional)
Authorized redirect URI: https://developers.google.com/oauthplayground
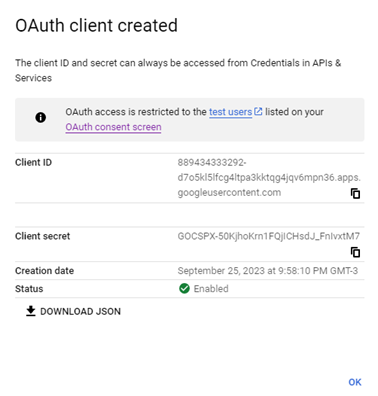
Click Create, and you will be presented with your Client ID and Client Secret:
 To complete this section, we need to obtain the token and refresh token.
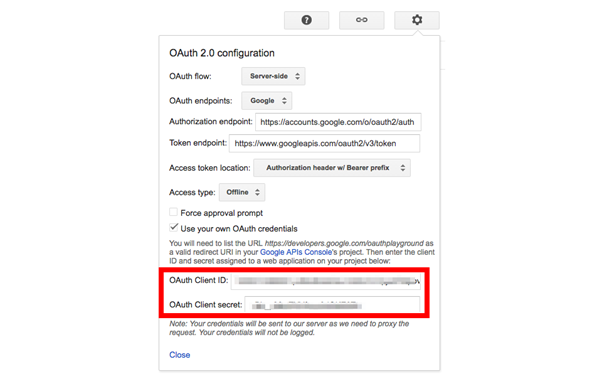
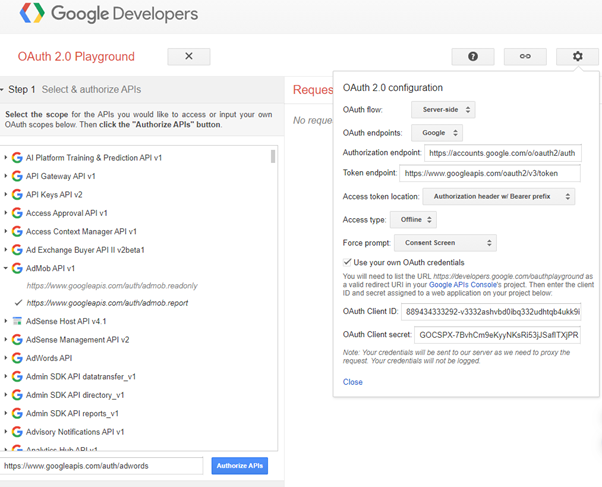
To retrieve your Refresh Token, go to the OAuth 2.0 Playground Click the settings icon in the upper right corner. Uncheck the box labeled Force approval prompt and check Use your own OAuth credentials. Input your Client ID and Client Secret.
Next, in Step 1: Select & Authorize APIS, enter ‘https://www.googleapis.com/auth/admob.report’ and click Authorize APIs:
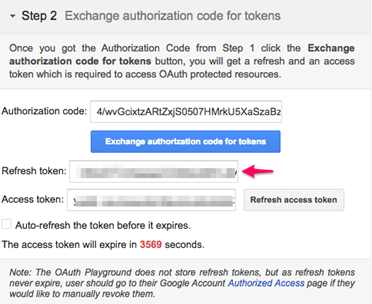
 Here, you can obtain the last two parameters that need to be filled in X3M to complete the configuration: Refresh token and Token
Connection at the Application Level
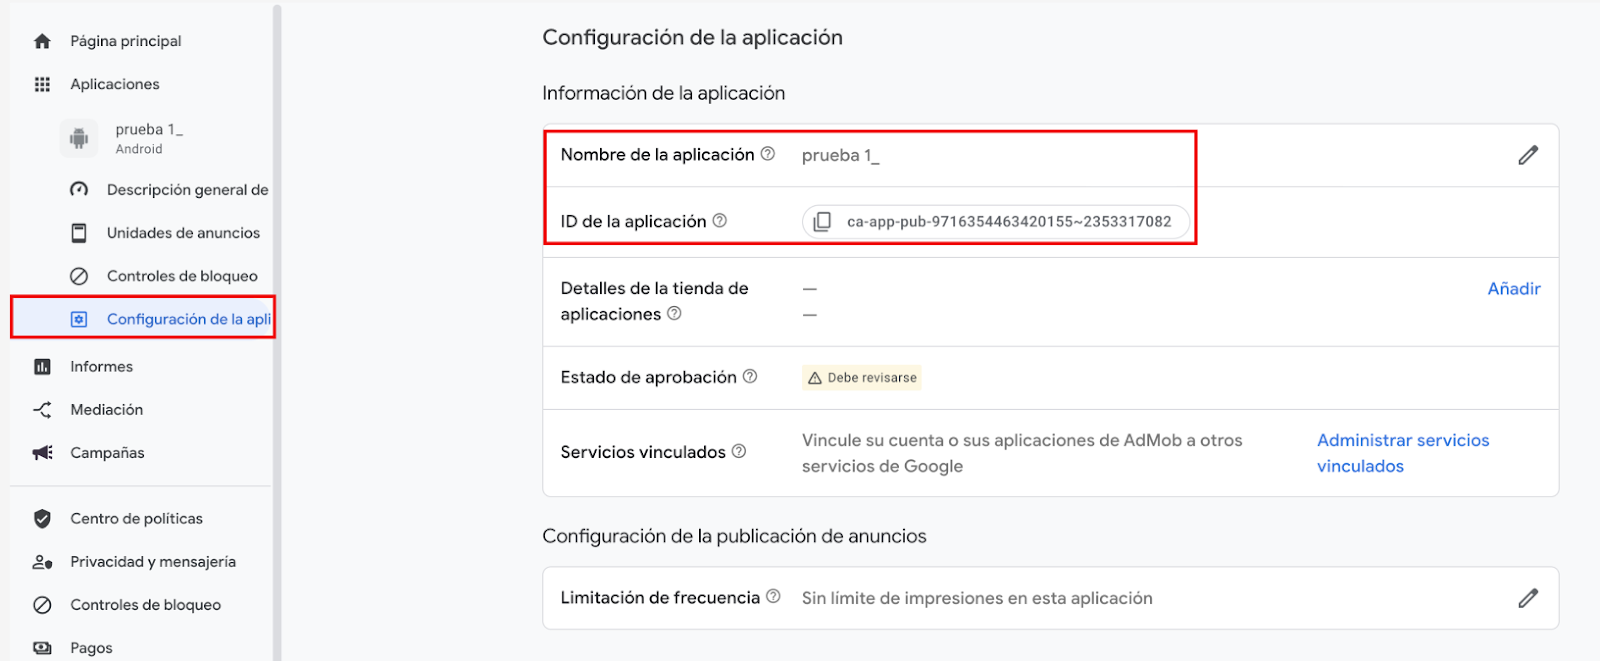
To connect AdMob at the application level we will need the following mandatory parameters: “Application ID & Application Name"
- Enter the app
- Click on the "Application Settings" section in the left side menu
- View the parameters on the screen
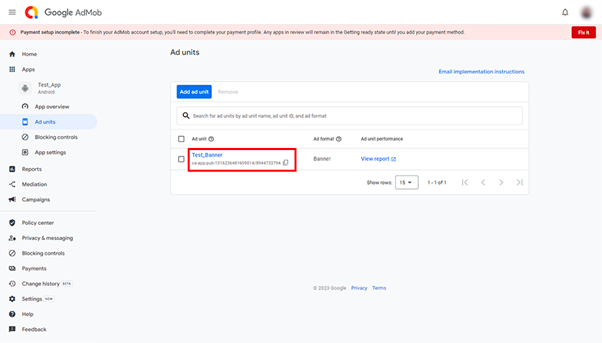
Connection at the Instance Level
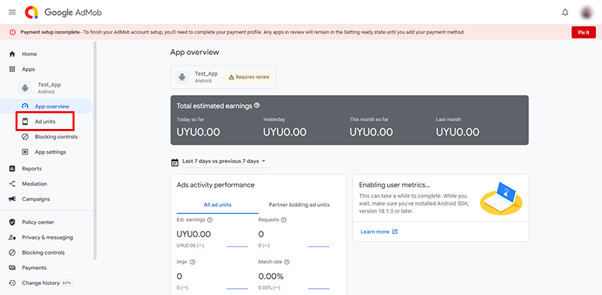
To connect AdMob at the application level we will need the following mandatory parameters: “AD unit ID”
You can find this by following these steps in AdMob:
- Go to the "Apps" section.
- Select the corresponding app.
- Click on "Ad Units."
- Here, you will see a list of the created Ad Units with their respective IDs.
Disclaimer: Do not copy and paste values from 'secret' fields (e.g., asterisks) as they may not copy correctly.